Friday, April 28, 2017

Santa's Beard Party Game

Mustruninthefamily.com

My girls love any game that is messy.  This game is perfect for a daddy/daughter party, family reunion, or Christmas party (Santa's Beard).

You will need :
Marshmallows or Cheetos
*Goggles recommended for safety

Separate group into teams of two.  Have one person from each team sit in a row of chairs.  Then, put shaving cream on there face to make a beard.  The other team mate must be about 5' -10' away facing them. Give them an equal amount of mini marshmallows or Cheetos.  They must throw the marshmallows/Cheetos at their teammates shaving cream beard trying to get them to stick.  The team who gets the most marshmallows/Cheetos to stick wins.

Her marshmallows are hard to see in the picture, but look close they are there.  We played this at our family Christmas party.  We called it Santa's Beard, It was a big hit.


Mustruninthefamily.com

We played this in the summer with Cheetos for a daddy daughter party.  The contestants thought it would be funny to put the shaving cream all over their face.  They thought it would increase their odds.

Mustruninthefamily.comMustruninthefamily.com

If getting messy totally creeps you out, we have played it with shower caps on our heads.  We put the shaving cream on top of the shower caps.

Have Fun and don't be afraid to get a little messy!

If you liked this post, you might also like:

mustruninthefamily.com

mustruninthefamily.com

Pie Eating Contest

Party Games


mustruninthefamily.com

mustruninthefamily.com

Bean Bozzled

Pie Face


Wednesday, April 19, 2017

How to Make Rice in an Instant Pot


It is so easy to make rice in the instant pot, and it comes out perfect.This is one on the reasons I LOVE my Instant Pot.
Plus, I got rid of my rice cooker, because the Instant Pot is so much more universal.

I follow the same water to rice ratio listed on the bag, for any type of rice.

We happened to be making Long Grain Rice. 
(Sometimes I like to do half rice and half quinoa for more nutritious benefits)

Long Grain Rice
2 cups of water to 1 cup of rice
(Look at the amount of cooked rice to ensure your desired amount will fit in the instant pot)

Pour in the rice.

Pour in the water.


Place the lid on the Instant Pot and make sure it is turned to seal.

Press the rice button.
The rice button cooks for 10 minutes.


Carefully, release the steam.

Use the handy dandy rice paddle that came with your instant pot, and fluff up the rice.


Enjoy!

I like to throw the inner pot into the dishwasher, and hand wash the lid for easy clean-up.
It's as easy as that.


If you liked this post, you might also like:

Tuesday, April 11, 2017

Ukrainian Easter Eggs

mustruninthfamily.com

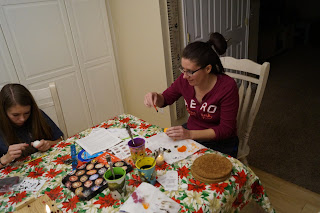
My husband's Family originates from the former Czechoslovakia.  Growing up he made Ukrainian Easter Eggs with his family, and wanted to share this tradition with our girls.  A few years ago we bought a kit and have been making these beautiful eggs ever since.  I will warn you, they are time consuming and not a good idea for little kids or persons with certain special needs. 
*There is a risk or getting burned and if you blow out your eggs salmonella.

You'll need:
Egg Dye (I recommend buying the kind made for these eggs)
Jars
Spoons
Kistkas (I recommend buying different size openings)
Drying rack
Vinegar
Water
Pencil
Paper towels
Optional:
Tablecloth
Old Clothes
Non-Latex Gloves
Polyurethane (Not water based or it will take the dye off) 

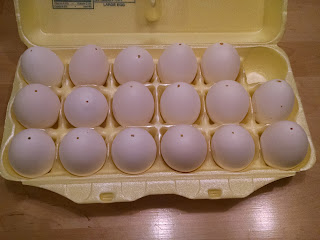
First, you want to blow out your eggs.  White eggs work best.  Learn how on our blog here.
You can use whole raw eggs, over the years the insides will dry out.  I wouldn't break it though.
Here's a link to the egg blower we used Marge's Egg Blower.

mustruninthfamily.com

We bought this starter kit, it has almost everything you need.
Her the link Luba's Ukrainian Easter Egg Decorating Kit.

mustruninthfamily.commustruninthfamily.commustruninthfamily.com

Make your dye, following the directions on the package.  The ones we used requires boiling and cooling, so allow time for this.  You will want a light color, medium color, and dark color.

mustruninthfamily.com

mustruninthfamily.com

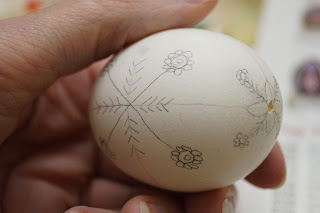
Using a pencil, section off your egg. Try not to use your eraser until after the dyeing process, it could effect the way the dye adheres to the egg.

mustruninthfamily.com

Using a pencil, draw your design on the egg.

mustruninthfamily.commustruninthfamily.commustruninthfamily.com

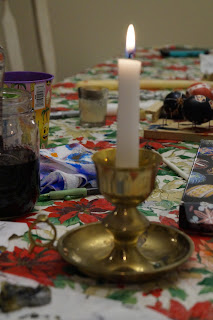
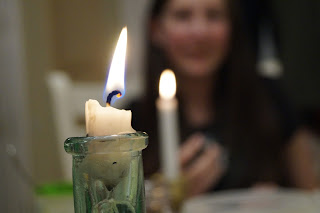
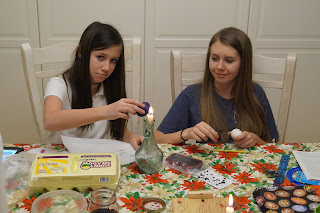
Using a candle get the tip or metal part of the kistka hot. 
Take all precautions with the candle not to start a fire or burn yourself or others.

mustruninthfamily.commustruninthfamily.commustruninthfamily.com

Dip the kitska into the beeswax filling the back end.
If there is wax melted all over the tip wipe it off.

mustruninthfamily.com

Using the kistka, fill in and seal of the holes where you blew out the egg.

mustruninthfamily.commustruninthfamily.com

Using the kistka draw over the pencil lines you want white, and fill in any section of the egg you want white.

mustruninthfamily.com

Once all the sections you want white are completely covered in wax, dip the egg in the lightest color.
The egg will float, use a spoon to hold the egg down into the dye.

mustruninthfamily.commustruninthfamily.com

Once the color is the desired shade, remove from the dye.

mustruninthfamily.com

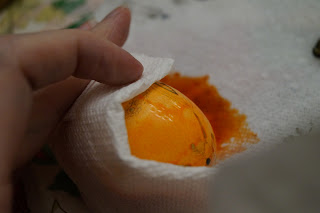
Wipe off excess dye on a paper towel.

mustruninthfamily.com

Using the kistka cover with wax the lines and sections you want to be the lightest color.  We used orange. 

mustruninthfamily.com

Once all the sections you want orange are completely covered in wax, dip the egg in the medium color.  The egg will float, use a spoon to hold the egg down into the dye.
Once the color is the desired shade, remove form the dye.
Wipe off excess dye on a paper towel.

mustruninthfamily.com
Using the kistka cover with wax the lines and sections you want to be the medium color.  We used blue. 

mustruninthfamily.com
Once all the sections you want blue are completely covered in wax, dip the egg in the darkest color.

  mustruninthfamily.commustruninthfamily.commustruninthfamily.com
mustruninthfamily.com

We used black. 
The egg will float, use a spoon to hold the egg down into the dye. 
Once the color is the desired shade, remove form the dye.
Wipe off excess dye on a paper towel.

mustruninthfamily.commustruninthfamily.com

Carefully, using the candle, melt a section of the wax off the egg and wipe with a paper towel.  Do not hold the egg to close to the fire or it will leave burn marks on the egg.  Do not hold the egg over the fire or it will also cause burn marks on the egg.  It is best to hold the egg off to the side of the flame.

mustruninthfamily.commustruninthfamily.commustruninthfamily.commustruninthfamily.commustruninthfamily.commustruninthfamily.commustruninthfamily.commustruninthfamily.commustruninthfamily.com

Once the wax is completely removed and the egg is dry put on clean latex gloves.  Put a few drops of polyurethane (Not water based, or it will remove the dye) on the non-latex glove and  rub over the egg.

Let the egg dry and you are done.

mustruninthfamily.com

mustruninthfamily.com

mustruninthfamily.com

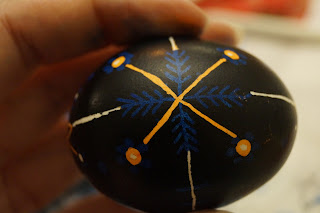
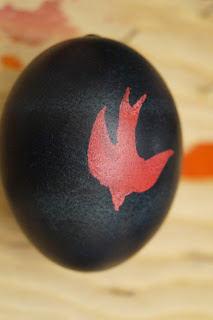
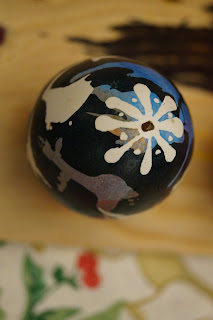
Enjoy these beautiful eggs.
If you are careful with them, they will last a lifetime.

mustruninthfamily.com

mustruninthfamily.com

mustruninthfamily.com

mustruninthfamily.com

mustruninthfamily.com

mustruninthfamily.com

mustruninthfamily.commustruninthfamily.com

mustruninthfamily.com

mustruninthfamily.commustruninthfamily.com

Don't forget to leave a comment and share with your friends!

If you liked this post, you might also like:
Easter Eggs


Easter Egg Hunt

Easter Cake


mustruninthefamily.com

mustruninthefamily.com

Easter Experiment