

We love playing games and spending time outside with a family. I have been wanting to make a set of yard dice for a long time, and finally got around to it. I am so excited to make extra sets for my family. Other than being time consuming, they were fairly easy to make. Right now I just have the Yardzee and Yarkle directions in my bucket, but I plan on adding other dice game rules in the future.
Here's how I made mine:
(Or you can just buy one on AMAZON here)
I traced these dice shapes onto my silhouette and cut them out.


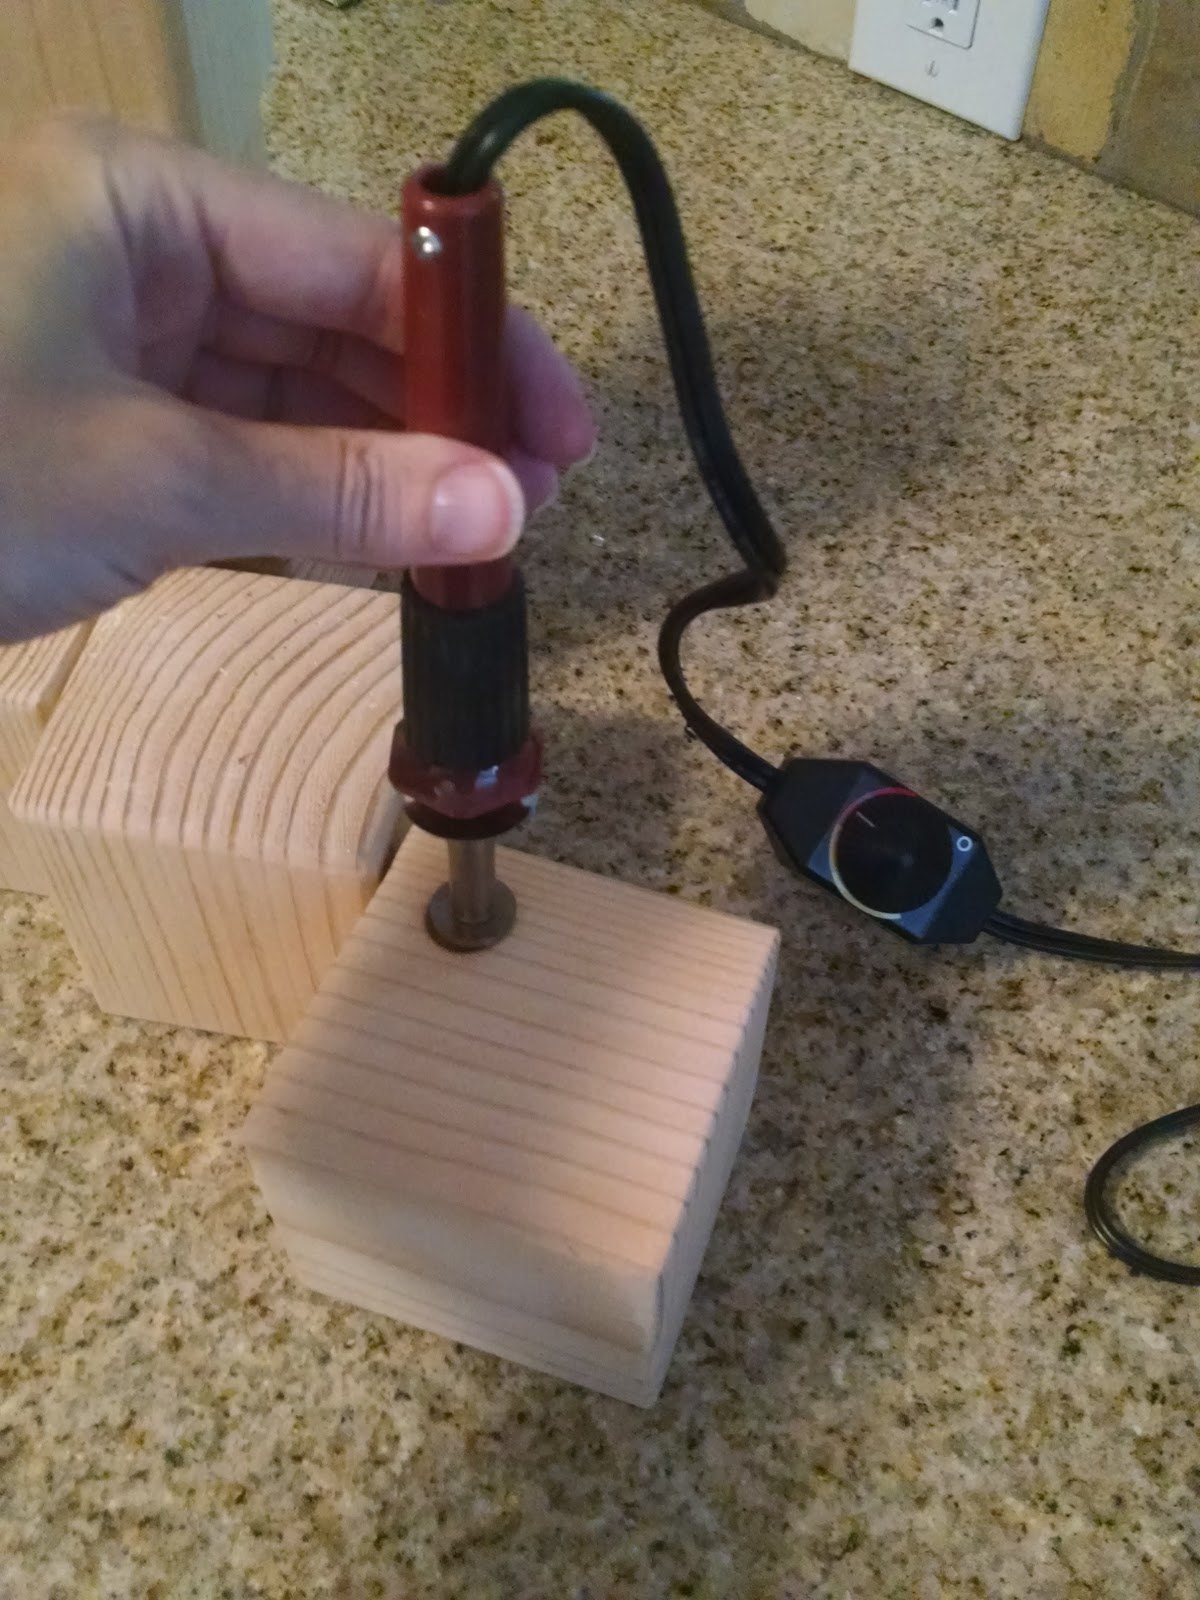
I bought this VERSA TOOL for my husband for Christmas. I thought he could do some wood-burnings, and we could also use it to decorate some foam pumpkins for Halloween.

One of the tips the VERSA TOOL came with is a circle shape.
It is exactly the same size as the dice circles I cut out.


I cut up a 10 ft. 4X4 into cube shapes. Obviously, there were more cubes then I needed, but I wanted to make a few sets for gifts. Remember just because they are called 4X4 they are actually a little smaller, so measure them before you cut to get exact cubes. After you cut them, give them a good sanding. I used this hand sander, but you can use whatever sanding method you want. I paid special attention to the cut edges, I wanted all edges to match. For Yarkle you will need six dice, but if you are only making a Yardzee game, you only need five dice.


I traced the dice circles onto the cubes.


You can either paint your circles, vinyl them, drill them, use a sharpie marker and color them in, or burn them.
I heated up the VERSA TOOL on the highest setting. I applied the circle tip to the wood for about 10 seconds. I found sometimes that was too much and sometimes I needed to hold it for up to 30 seconds. I recommend doing this outside. It does have a little smoke and smoky smell.


After I burned all the circles on the dice, I wanted to protect them with polyurethane. I put 6 coats on. I was easy to get all the coats right, because I turned them all to one. Then, the second coat I turned all the dice to two and so on.

I found these cute score sheets. There are tons of other ones online, but these are my favorite.

I laminated my score sheets with my personal laminator. This will make it easier to reuse them with either a wet erase or dry erase marker. I personally like wet erase better. You can easily clean them with a baby wipe for wet or tissue for dry erase.

I used the same design on the top of the score sheets for the bucket label. I traced it into my silhouette machine, enlarged it, and cut out onto Oracal 651 vinyl.

I wanted a good size bucket to hold my set. The 2 gallon size was just a little to small, so I went with the 5 gallon size. I love the size to house the game, and it came with a lid, but it was a little large to use when rolling the dice. You can use any bucket or pail the dice will fit in.

I included a calculator, game directions, scorecards, and markers inside my bucket.
My poor dice did get a little dinged up when we played the game, but it was a lot of fun.
Just think of it as the are now rustic.
Hope you have a lot of fun getting outside for a some family time.
If you liked this post, you might also like:

